Preparing Your Garden Shed For Winter
18.10.2017
What do you need to do to prepare your garden shed for winter? Nothing! Your garden shed is perfectly capable to survive this winter and the next 10 winters without anything you need to do if it is well maintained, tidy, clean, and functional. And with “functional“ we mean mainly well protected against water and moisture from above and from the ground.
However, with winter approaching, you might take this as a reason to check on the state of your garden shed to make sure it is in a condition to go through the long, cold, dark and wet season without any damages to its substance, and to the things that you store inside. To this end, we have put up the following little checklist for you.
Shortlist of how to prepare your garden shed for winter:
- Tidying up: store things that could be damaged by water or moisture away from the floor.
- Cleaning up: Mud, dust, insects are bound to retain water and moisture and are a perfect condition for rotting wood
- Take care of holes and cracks: After tidying and cleaning this is the perfect opportunity to inspect for holes and cracks and fix them
- Check the roof
- Check windows, doors and their respective frames as glass is often connected with water
- Clean up the outside and get the outer walls some ventilation
- Check your rainwater drainage: guttering and ground drainage around the foundation
- Is a wood treatment due?
- Check insulation, heating, ventilation or maybe:
- Upgrade by insulating and installing a heating
- Upgrade your storing facilities
- Clean and treat decks and railings
Tidying up your garden shed
This should always be the first step because only then you can do a proper inspection, cleaning, and fixing where necessary. The best opportunity for it would be a stretch of nice, sunny autumn days, where you could just clear out the garden shed from everything that does not have a proper place to stay or blocks the free view on the timber that you will need for the following inspection, but any time with any weather would be better than not doing it at all because the sunny stretch might be missing. Everything on the floor should be cleared out in order to remove dirt, debris, and mud that might have gathered under it and could block the ventilation of the floorboards.
Cleaning up your garden shed
Sweep it out and also wiping is OK if you give the floor the necessary time to dry up fully afterwards. Dust off the walls and shelves and don’t forget to clean the window – and door frames as they will be inspected, too.
While you are at it, it would be a good idea, to also clean everything that will be stored in the garden shed during winter. Especially gardening tools like shovels and other implements, wheelbarrows, lawnmowers, or whatever you store in there. The garden tools with metal should air dry and you might treat them with a thin layer of lubricant to prevent rust formation.
Inspecting your garden shed
With everything cleared out and cleaned you will have the perfect opportunity to give your shed a proper inspection from the inside. Any wet spots or mould should ring the alarm bell, and you should find the reason and fix it permanently.
Repairs to the roof are sometimes tricky. You need to find the leak and fix it permanently. Moisture on the floor is sometimes due to things stored on it with mud or dirt under them. If it is due to moisture from the ground, it is time to check the drainage of the foundations and the ventilation under the floor and all around the garden shed.
Cracks are normal in wooden garden sheds. Only if you can see the light through them from the inside, you should fill them up with fitting wooden slivers or chips with a water-resistant wood glue. Of course, the crack has to be dry for this. You might heat it up if it does not dry up on itself. After that, a water-resistant lacquer on the outside could prevent water from entering the site. Really big cracks will not occur in garden sheds from renowned manufacturers. If you have one, you should also look at it from the outside and decide what to do to stop rainwater entering. A slat glued over it from the outside might be necessary.
Caulking holes and cracks might also be a good way to fix them, if they are not too big and if the caulk is well suited for the task.
Upgrade your storage facilities
With the floor of your garden shed and tools and machinery drying off from the cleaning, it might be a good opportunity to think about, how to store everything and how to give things that might have just had a place on the floor so far a proper storage place on a shelf or inside a box.
Needless to say that you won’t return anything back into the shed that is broken or that you no longer need.
Shelves and hooks are never wrong in a garden shed. Hooks will take gardening tools, materials like wire or cables, and even your garden hose. Shelves are good for anything else. If you store gardening soil, compost, fertilizer, or other organic materials, they should be packaged into waterproof containers or bags and then be put on the shelf. Anything you can lift off the floor will help the floor keep dry and well ventilated.
If you use boxes to store small items you should label them or use transparent boxes so you can easily find what you are looking for.
Tools can be stored on a tool wall. You can also drill holes in tools with wooden handles and hang them on boards with decapitated nails in them.
Checking doors and windows of your garden shed
Wooden window frames and door frames are one possible entry points for water and moisture. Glass windows can also collect condensed water which will then flow down the glass to make the lower frame permanently wet. On the outside the same happens with rainwater. So after washing windows and frames with hot soapy water, you can check for paint blistering, water ingress, and rot. If you find any of these, you need to dry the wood first before applying end grain sealant and a waterproof lacquer. If your old lacquer formed a film on the surface rather than penetrating into the wood, then you need to remove the old lacquer around the wet spot first in order to let it dry out properly.
Rotten parts might also be replaced. You might want to include a professional carpenter in this because making window frames from wood is a business that requires a bit of specialized knowledge. Anyway this should be done rather earlier than later unless you plan to replace the entire window frame soon.
Hinges, handles, and locks can be checked for proper, smooth functioning and be oiled. Draft excluders help insulate the inside and keep it dry.
Neaten the outside of your garden shed
As nice as it is to make your garden around your shed a little green oasis in the concrete jungle, as important is it for a wooden garden shed to have proper ventilation around the outer walls. Shrubs, bushes or long grass can damage the lower walls and the underfloor by blocking ventilation and prolonging the wet periods after a rainfall. Cut the plants back to give your shed at least 3 to 5 inches of space to breathe, and also check if the underfloor ventilation is still open.
Any drains should be cleared from foliage and the overall drainage of the shed should be clear. Any surface water during heavy rains, or during the melting of ice and snow should be able to flow away quickly from the foundations.
Guttering and roof should be cleaned of foliage thoroughly after the last leaves have fallen, a rainwater tank should be emptied a barrel kept upside down to prevent damage from freezing water.
Wood treatment
Depending on the wood species it is recommended to treat your garden shed around every five years. At least the weather side might profit from a regular treatment. If you find moss or lichen on the outer walls, this is a sign that there is moisture in the wood for prolonged periods and it would be a sign that a new treatment is due.
Rather than treating with lacquers that form a film on the outside as it was done in the old days, nowadays mostly treatments are used that penetrate into the wood. One advantage of this is that you don’t need to remove the old paint before the new treatment.
Of course, if you start painting, this might also be the right time to think about the appearance of your wooden garden shed. A wood treatment can be the perfect opportunity to change the colour into something more likeable. Do you like some more colour in your garden, do you prefer the natural wood colour, or do you like the dark grey that comes with the ageing of untreated wood? The latter is mostly caused by UV-radiation. So, if you like natural fresh wood colour, you might mind using a treatment with UV-protection.
If your garden shed has a wooden deck, then you should clean it properly, let it dry and treat it with a wood oil. Remove all objects standing on it, like pots or umbrella stands and store them on the shelves in the garden shed to keep the surface of the deck open to ventilation during the wet season.
Upgrading your garden shed
With all repairs finished, the shed cleared out and clean, this might be the perfect opportunity to think about heating and insulating your garden shed to make it useable all year round, to use a frost guard in it to keep frost sensitive plants there over the winter, or to start early crops already in February on the enlarged window sills.
The overall storage quality will be increased in a frost-free garden shed. It will be dryer and you can store your battery powered tools in there, too.
With all this considered and realized, your shed will look forward to the winter and the following spring, when you will start your next gardening season with a well organized and well-maintained garden shed.
Categories:
Useful Tips
When planning a garden office in the UK, integrating both functional needs and personal style is key, especially when various types of structures are available, such as garden office pods, cabins, and insulated offices. Here’s a refined approach incorporating these elements: There are more areas to cover as per your needs but above areas are…
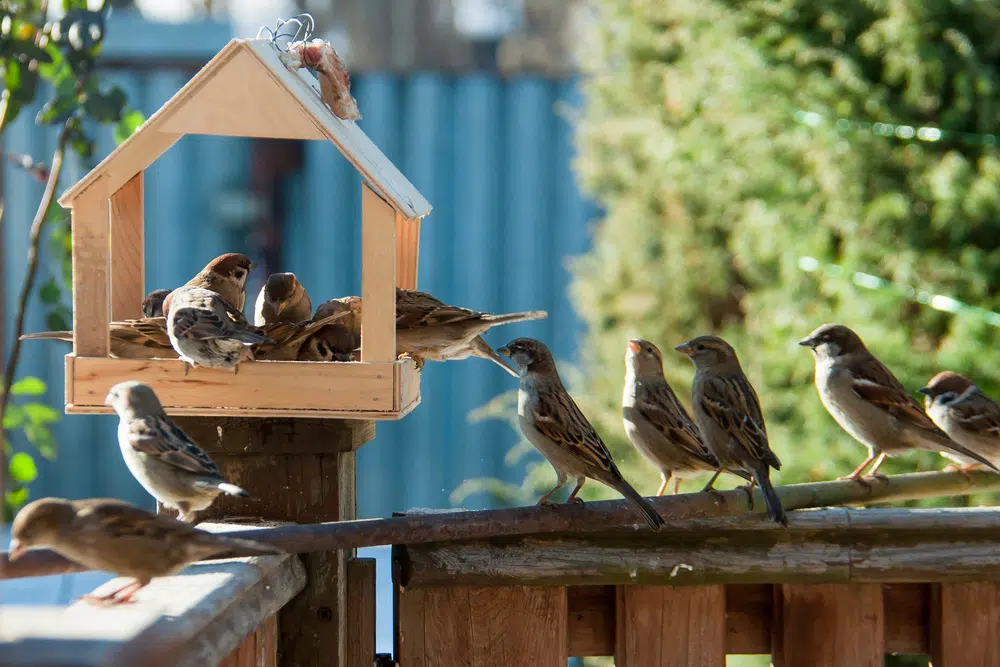
With summer fast approaching, it’s the perfect time to turn your garden around the summer house into a sanctuary for our feathered friends. Here are “10 Things You Can Do to Help Wild Birds Around Your Summer House,” packed with tips that are easy to apply in your garden to support birdlife throughout the season….
A garden room, a small outbuilding, can be quickly added to any outdoor space and used as a cozy extra bedroom. There are many different options available on the market when it comes to garden rooms, some are designed to become garden offices, hobby rooms, and art studios, and can even have multiple functions. A…

In 2024, as we celebrate the ‘Year of the Dragon’ in Chinese mythology, a year rich in symbolism representing strength, power, wisdom, nobility, good fortune, and success, it’s crucial to harness positive energies not only within our homes but also in the extensions and additional spaces nestled in our backyards. Garden rooms offer a canvas…
Want to discuss over phone. Let us call back to you
If you need any additional info regarding any product, please fill in the below form and we will get back to you, usually the same or next working day.
Have any questions regarding some product?
If you need any additional info regarding any product, please send us your questions.